BLOOP: BIG CHUNKY GLITTERS SWATCHES


Good Morning Girls.
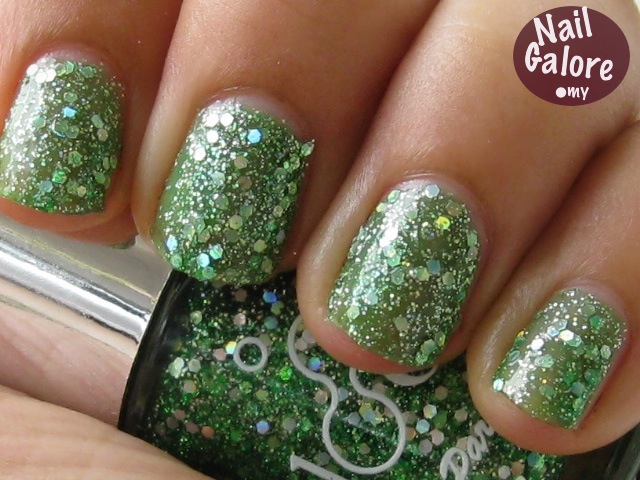
Ever wonder how big chunky glitter nails will look like if you had them on? Well have a look at it by yourself (on my nails of course)

Natural light:

Up close- with flash

Natural Light

Up-Close: with flash

Natural Light:


Up Close: With Flash

This range from Bloop de Paris is all so chunky huge! I’m not such a fan of big glitters but these are cool! It looks like little diamonds on my nails under the flash. Application wise it was easy to apply; unlike other huge glitters. The only thing is that it didn’t give the shine you would hope from a polish, so applying a top coat would be great (the pictures didn’t have one). In terms of opacity, the base colour isn’t so opaque as you can see on my nails. This was 3 layers and yet it couldn’t give such a good coverage. 
The worst part was to remove them. As you all know removing glitters can be a pain in the arse at times. But no worries; just don’t rub the remover all over the place. I mean soak your cotton balls in the remover, place them on the polish for few seconds till you think they are all fully ‘covered’ by the remover, and using one swift motion, pull them off. This will reduce the glitters from spreading all over the place.
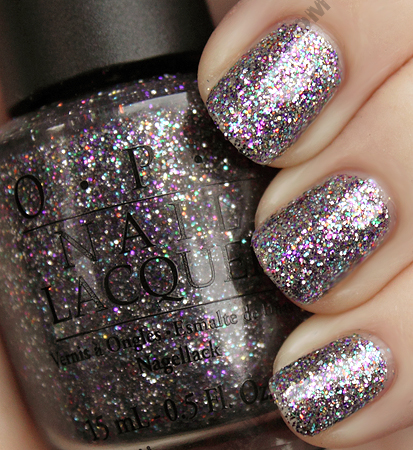
As for the colours, I don’t know why but I feel like it would look like OPI's Mad As Hatter or Deborah Lipmann's Happy Birthday if I painted all three together:


But apparently not huh?Wish they were smaller glitters:-) Well.. No harm trying..

DISCLAIMER POLICY: These were passed to me for review. 


Like what you read? Make life easier and be the first to know
Become our follower:


read more "BLOOP: BIG CHUNKY GLITTERS SWATCHES"

OPI AT FIRST SIGHT & NAIL TEK MATTE TOP COAT SWATCHES

This look I have on my nails today wasn’t even suppose to be a post. It was suppose to be an ordinary self manicured nails on a quiet Sunday night. Well at least it was up until the time when my forgetful mind remembered I purchased a matte top coat by Nail Tek about 2 months ago and put it on my tiny little nails just to try it on and tada.. it turns out to be the perfect finish for my polish. Like seriously!

I know I’ve gone on and on about how I’m getting tired of matte these days and bla..bla but occasionally I do feel like putting them on; like today. The colour i have on my nails right now is OPI’s At First Sight- something nude-ish for work tomorrow. Look at it and tell me it isn’t beautiful?:-/


The original At First Sight without any top coat:

With Nail Tek Matte Top Coat: 
(Flash)


Without Flash under indoor lights

Upclose with flash 

The finish is very satin-ish matte instead of chalky matte. OPI’s Nail Envy Matte that I used previously does give a matte finish to a certain degree (not very matte, matte finish) but Nail Tek’s Matte Top Coat brings that finish to an additional level. A stage that probably hasn’t been reached by any topcoat I’ve used before. Why is that so? Because it gives a not so matte; more satin, finish :-D

My nails, in real, I would say it looks like mannequin’s nails (As usual indoor pics doesn’t give any justice to the real thing). But my best friend on the other hand couldn’t agree with me when I said that because for her, it looks deadly pale. But hey, isn’t that how mannequins should look like? :-D Probably because of the base colour. But overall, my point is, I think the top coat is great. Ill probably do another swatch on this topcoat using different colour some other time and day.

While then..TC, and Good night


Like what you read? Make life easier and be the first to know
read more "OPI AT FIRST SIGHT & NAIL TEK MATTE TOP COAT SWATCHES"

WEEKEND PROJECT: RECYCLE NAIL ART


Hi girls.
The project this weekend is to do sort of like a recycle nail art. Well not really 'recycle' recyle but recycle:-D
This kind of nail art is known as the newspaper nail art. Truthfully i didn't use any newspaper for these because as you know- our newspapers are not white; more yellowish isnt it? So i used magazines instead to create the 'newspaper' look:-)

Here is how i did this.

1.          Firstly, paint you nails with base coat and desired background colour. Here i'm using the Face Shop's white polish (its so not nice! So thick and hard to apply!)


2.        Then tear newspapers (magazine in this case) to small pieces and stick them on your already dried nails using a topcoat.

3.        Press the papers down to flatten them- I used the back part of the orange stick.

4.       Then lastly apply a layer or two of top coat for a perfect finish (mine is quite messy- well 1st time:-)


I tried putting my nails under running water after it was completely dry and it perfectly stayed in place so i don’t think bathing and all will influence the nail art. It should be ok for a day or two provided you take good care of it. Just make sure you put a layer of topcoat every day if you want it to last:-)
Oh ya.. i added some variety to it. Hope you like them:-)


read more "WEEKEND PROJECT: RECYCLE NAIL ART"

MEDITERRANEAN NAIL ART

Good morning girls..
This is one of those post where i randomly just paint my nails and come up with a name for it:-)

hehe.. Anyway today for the fun look is mediterranean look. Simply wanted something colorful on my nails and use all the rhinestones i've purchased during my last visit to the nail art shop- Damn should have purchased the swarovski ones instead of these cheapo. 


What you need to create this look:
-Nail polishes (i used- bloop black, Orly Bailamos, zoya coco, Essie mint apple candy, Chanel Paradoxal)
-brush (the sharpest you can find)
-rhinestones

How To Do It?
First, colour a small part of your nails with a colour. Make sure not full nails only 1/4 of it. Do the same for the whole nails using other colours
then just draw lines in between these colours to make it look 'cleaner' and 'smoother'.
Put clear top coat on the parts you want to place your rhinestones. Stick your rhinestones. Done:-)

Easy right? Sorry if it looks awful:-( I'm a dummy when it comes to nail arts. So i was hoping this would be a dummies guide for some nail art dummies like me out there:-)
So.. Tahan a bit k:-)

Tc..

read more "MEDITERRANEAN NAIL ART"

HARU SAKURA NAIL POLISH SWATCHES AND REVIEW

Good Morning girls..
Review today is on one of the Japan made nail polish, bought from a shop called Yokoso! in Sg Wang during my visit there bout 2-3 weeks ago.
I took pics for these like weeks ago so forgive me if i cant recall clearly much about it:-)
I bought 4 colours from there but unfortunetely i could do swatches on 3 only coz i cant find the other one:-(
So the colours here are:


This is a number 76 colour. Whitish-silverish colour with glitters in it. Quite nice:-)


This is a pure metallic green. Exact same colour as the picture.


metallic blue. My favorite among all the swatches in this post. Same colour as well.

The colours are quite common. Application wise; i didn't really like the brush. Every time i painted few will get stuck on my nails so it was a bit irritating coz ill have to repaint again. Argh!! 
Formula it was quite easy to apply but very 'cair'. might need about 3-4 coats for full opaque coverage as above.Plus it doesn't even have the Big 3 free.:-(
Price; it was Rm 15 and overall; its an ok polish. Nothing great. I certainly wouldn't buy it anymore:-) Sorry girls.. as usual don't like the smell.


read more "HARU SAKURA NAIL POLISH SWATCHES AND REVIEW"

FIMO NAIL ART: AN INTRODUCTION

Good morning girls..I was just wondering if you girls knew what fimo nail arts were? Heard of it before? Well hopefully this summary i'm gonna give you is sufficient enough:-). 
Ok you know the clay like thing that they put on the nails that can easily be found in Sg wang and places like that? This:
Now thats Fimo Nail Art. Basically its a moldable polymer clay that can be used  to make nail arts. These clays then can be cut into a paper thin slice ( if you can. I couldnt:-() and then tada.. you can use them as designs for your nails. Most of the designs that can easily be found are butterflies, fruits, leopard skins, flowers and various other colourful shapes. And the best part is: its cheap! Only Rm 1! 

So neway, this is what i started with. 

How to do it?
1) Paint a base colour
2) paint clear top coat and paste the fimo nail art wherever you want. Press them down with orange stick or something.
3) Put on some glittery polish on the tips.
4) Put on a top coat for glossy finish.

At the end it would look like this:


I didnt really like them so much. I got these tips in various websites and seriously, i couldnt get them to look like this:

click here to view source

So, me being all bored and all, i did this: 


Hopefully it looks ok:-)

So how did your 1st design go? If you've done it before :-D


P/S- I saw D-Mask selling some Fimo sticks. do click here to visit them. I also saw them here but they look more pricey:-(
  
read more "FIMO NAIL ART: AN INTRODUCTION"

NUBAR MODERN MATTE COLLECTION SWATCHES & REVIEW

The collection im gonna review today is a matte collection. Yes mattes! It consists of 4 new colours. 


 Avant Garde is a brownish red. Very classy. The second picture is with Nubar Diamont Top Coat, and the other 2 fingers are topped with Nubar Happy Anniversary.


Vital is a purple matte that looks more like plum. cute


Contempo is a bright red. You know the type OPI releases every now and then. Ya that red:-)


Prevail is my favorite in this collection. Dark purple. A total beauty. Its such a waste the picture isnt that great:-( But it is really nice!

Overall for this collection of matte; ill have to agree that these mattes are so far the best mattes i've come across. It was so easy to apply (very forgiving coz the drying time isn't as fast as the other mattes), and it actually has a smoother finish rather than the ordinary chalky finish-if you know what i mean:-)
Overall.. I'll give it an A+++++ if it wasn't for its price:-(


read more "NUBAR MODERN MATTE COLLECTION SWATCHES & REVIEW"
Related Posts with Thumbnails